
Teen Titans GO! Games
I had the privilege of working on games not only for Cartoon Network but also for DC Comics and Warner Bros. Animation! Our team was even given approval for our cinematic sequences by their animation team, which was an incredible honor. Working on Teeny Titans - Teen Titans Go! and Teen Titans GO! Figure was an absolute blast. It was surreal to collaborate with so many talented voiceover artists from the show, including the legendary George Takei, who voiced Mr. Chibi. The mobile game was a massive undertaking, but as a team at Grumpyface, we were able to deliver two fantastic games. Following the launch, we received several positive reviews, some of which are included below.
“Teen Titans GO! Figure” - Released in 2018. Ranked #10 in Roleplaying games on the iOS App Store as of October 2019
“Teeny Titans” - Paid App with over 1.2 million downloads and a 4.5/5 star average user rating w/over 2.4K Ratings on iOS App Store
Process
When the first Teeny Titans game was being developed, the requirement of having 77 playable characters had never been done before at Grumpyface Studios. Fortunately, around that time, I was experimenting with writing MEL scripts in Maya to automate repetitive tasks for rigging. After a few weekends of trial and error, I was able to create a straightforward auto-rigging script for bipeds that addressed the need for a large quantity of character animation rigs. Despite being a programming novice, the script proved successful for these large projects. I relied heavily on forum searches, "echo all commands," and copy-pasting code using Maya's script editor.
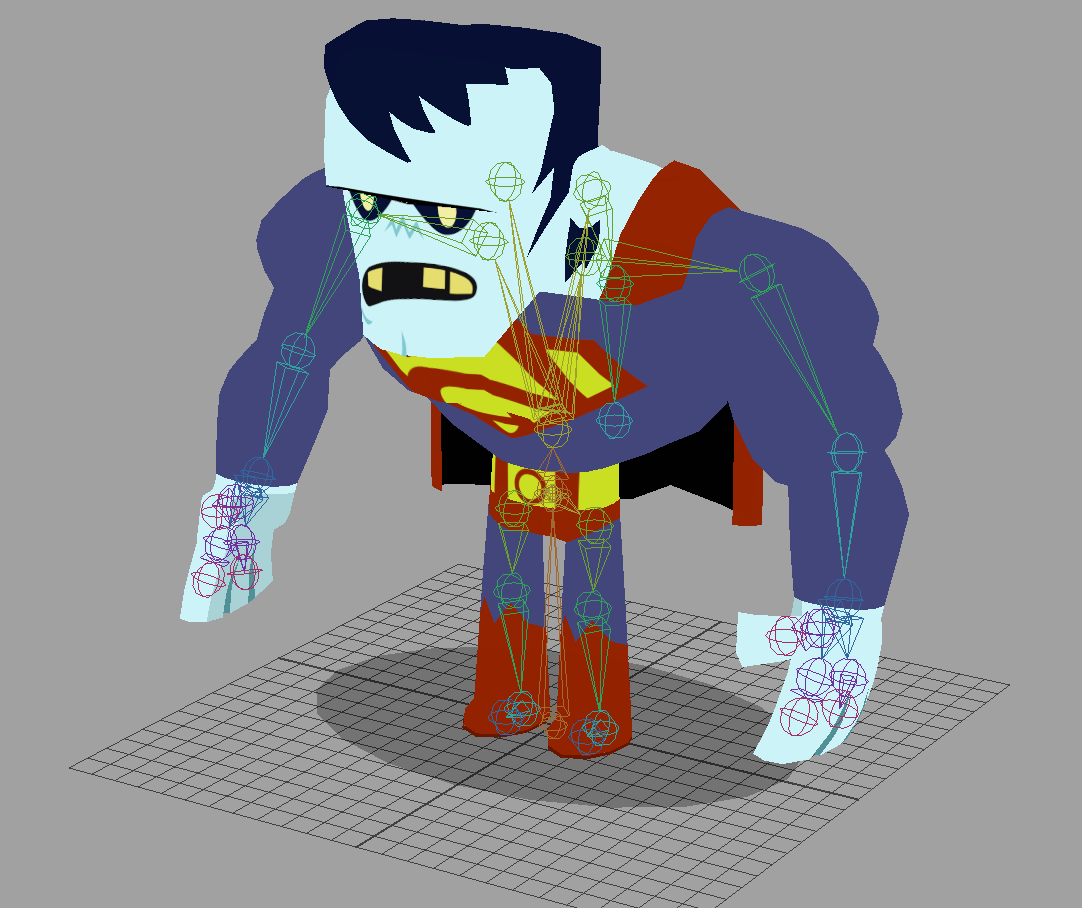
Bizarro model skinned to joints and ready for rig.

Bizarro rig file with controllers, constraints, and face rig.

Bizarro animation file with camera, attack dummies, and successfully referenced file system.
The following image outlines my typical 3D workflow for creating game assets in the Teen Titans GO! games. After receiving approval from Cartoon Network on the concepts for characters, props, and environments, the 3D department would begin the production process. The first stage is modeling, followed by creating UVs and texturing. Next, the model and texture are optimized and sent to rigging. Using my rigging script, I would prepare the models for animation and set up Maya's referencing system. Animation clips and FX previews are generated and approved by the director and art director. Animation logs and handle events are kept for Unity keyframe implementation. The animation is baked to FBX files and imported into the Unity game engine. In Unity, I create necessary materials, shaders, textures, particle systems, and animation clips with animation controller, which are then packaged into a prefab for programming handoff.
Visual of software used at each stage of production for the Teen Titans GO! games 3D workflow.
Character Animation
During the production of the Teen Titans GO! games, I had to create animations that were fun, fast, and superhero-like. To meet these requirements, I developed new techniques for animating quickly under tight deadlines. In the image on the right, I show how I solved the problem of revealing the player's handheld device for figure selection before battles. To make the animation fun, fast, and superhero-like, I drew inspiration from the smear-frame spinning technique used in the original 1960s TV show, Batman, and incorporated a playful yet snappy bounce to reflect the style of Teen Titans GO! The duration of the animation sequence was kept short enough to maintain user attention while conveying the necessary information on the screen.
Handheld device intro animation to idle animation.
Planning Animation
Establish character attributes
Attitude
Weight
Speed
Strength
Sound
Establish a hierarchy of movements
Blocking animations
Timing
Polish pass


3D Environment Asset Management
The production of 3D backgrounds was also a significant task in the Teen Titans GO! games. The process involved starting with the completed concept art from the 2D art department. Before modeling the assets, a meeting would be held to discuss the asset functions, which would inform my approach and organization for creating the large sets of required assets. The image below shows the process I used for developing the Titans Titans GO! environment assets.

Arkham interior for Teen Titans GO! Figure.

3D environment asset workflow process.
The placeholder geometry for stage layout, roughed in by me or another artist, was exportable to Maya from Unity via a plugin, which helped greatly in asset scale accuracy, texture resolution measurements, and ease of implementation inside Unity.
To optimize the environment assets for the Teen Titans GO! games, I had to follow certain programming requirements. These requirements involved putting as many 3D asset texture maps on a single texture map as possible, ideally only for the needed assets in a scene. This approach helped reduce the computation load on the device and improved the overall performance of the game.
To export the assets to Unity, I would gather the model's FBX file along with its associated texture, shader, and material. These assets would then be combined into a prefab variant system within Unity. This system allows for easy updates to any contained assets that may need to be changed at a later time. Once the prefab variants were created, they could be easily imported into the appropriate game levels.
To begin the layout process, I would update the blocked-in scenes with the corresponding game assets and organize the scene's hierarchy based on relative objects. Any old assets would be deleted at this point.
Gotham City view from Unity editor.
Metropolis City view from Unity editor.
Jump City from Unity editor.
Marketing Materials
During my time working with Cartoon Network, I was tasked with assisting in the creation of marketing GIFs with a tight deadline. To ensure efficiency, I utilized repetition and rendered out Blue Beetle and Alfred figures from Maya. I then used After Effects to handle the remainder of the marketing process. The completed GIFs were later posted on social media platforms.
Cinematic Animations
To start the cinematic workflow, the Art Director and Director would create a cinematic animatic, which would then be approved by Cartoon Network. I would then create a shot list based on the animatic and determine the number of frames needed for each shot. This measurement helped me establish how much time I had per shot to convey the desired action for the scene. While the 2D Art Department was working on final art for the animatic, I would set up my scenes and folder structures in After Effects.
Once the 2D concept art was completed, I would deconstruct it and rig the content into After Effects for cinematic animation. The first step was always to animate the motion of the character's bodies, before adding in lip sync animation, which is often treated as a separate level of animation when creating videos. Since motion is more attention-grabbing than lip sync, I prioritized animating the former. Once the cinematic scenes were approved by our Art Director and Cartoon Network, I would compress and export the videos for the game engine.